Have you ever wondered what to do with those special flowers from meaningful moments in your life? Most people simply toss them away when they start to fade. But there’s a better option waiting for you!
I’ve found that creating a shadow box for dried flowers gives these natural gems a second life. The simple act of placing them in a framed display turns ordinary plant material into beautiful wall art that lasts for years.
With just a few basic supplies and some creativity, you can make stunning displays that tell your personal story. These frames become talking points in your home and cherished keepsakes.
In this guide, I’ll show you my favorite dried flowers to use, step-by-step instructions, and useful tips for designing your own shadow box. No fancy skills needed; just your love for nature and memories.
Let’s start making something beautiful together!
Best Flowers for Shadow Box for Dried Flowers Display
Not all flowers are equal when it comes to drying and display. The right choices will keep their shape and color for months or even years in your shadow box for dried flowers.
Excellent Choices
These flowers dry wonderfully with minimal effort and look great in displays:
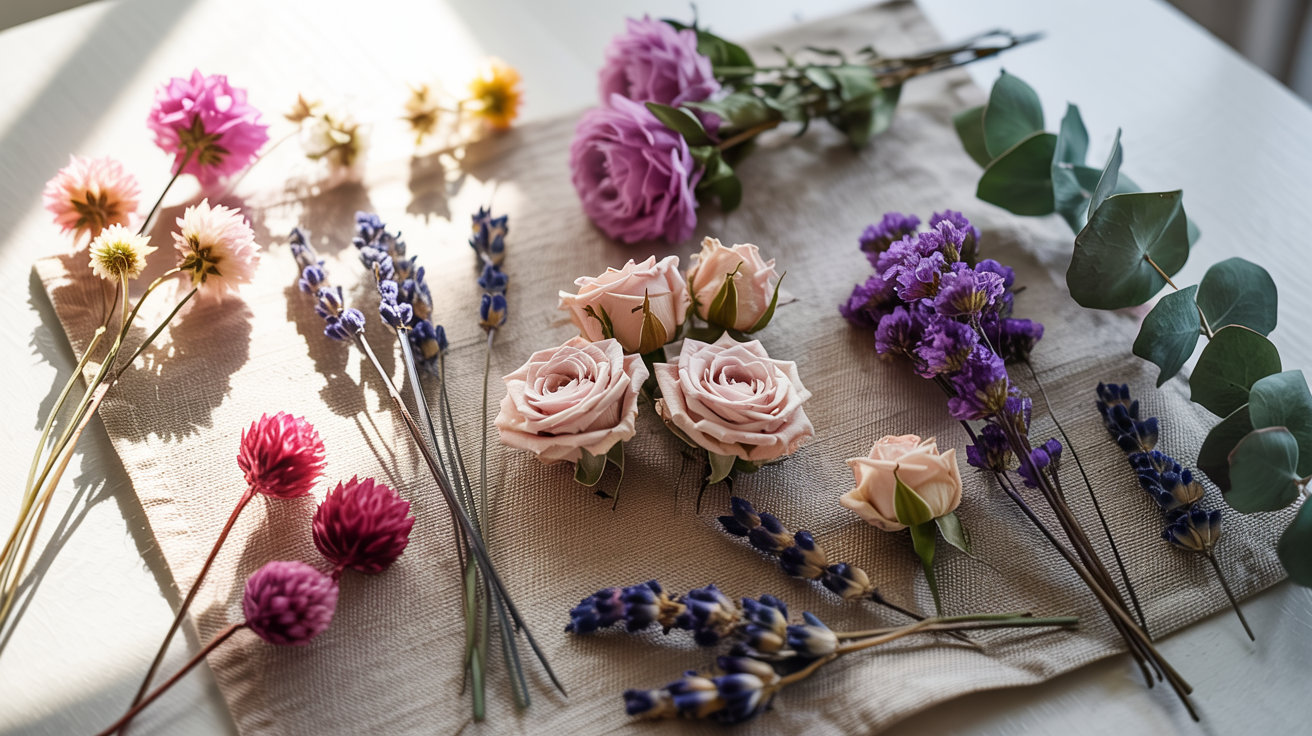
- Roses: Small to medium roses hold their shape and often deepen in color when dried properly.
- Lavender: These small purple stems dry easily and add both visual appeal and a gentle scent.
- Statice: Known for keeping its color after drying, statice comes in purple, white, and yellow.
- Baby’s Breath: These tiny white flowers create a light, airy look in any display.
- Strawflowers: These paper-like blooms are actually made to be dried and keep their bright colors.
I find these options work well for beginners since they dry without much special treatment.
Challenging but Possible
With some extra care, these flowers can be stunning additions:
- Hydrangeas: These large blooms need careful drying but create dramatic focal points.
- Daisies: They can work if dried quickly, though petals may curl slightly.
- Peonies: These require special drying methods but reward you with beautiful results.
- Sunflowers: Small varieties work better than large ones, which may lose petals.
- Zinnias: These colorful flowers need quick drying to maintain their bright hues.
I recommend trying these only after you’ve had success with easier flowers.
My Personal Favorites
After making many shadow boxes, these are the flowers I return to most often:
- Globe Amaranth: These small, round purple or pink blooms look almost the same dried as fresh.
- Billy Buttons: Yellow ball-shaped flowers that add unique texture and bright spots of color.
- Eucalyptus: Though not a flower, these leaves dry beautifully and add structure to any display.
I’ve found these create the most impressive results with minimal effort.
A shadow box for dried flowers works best when you mix different shapes, sizes, and colors. Try starting with flowers from the “excellent choices” list, then branch out as you gain experience.
The best display often combines larger focal flowers with smaller accent blooms.
How to Create a Stunning Shadow Box for Dried Flowers
Now that we have all our supplies ready, let’s walk through the actual steps. Making a shadow box for dried flowers is simpler than most people think!
Step 1: Gather Your Materials Thoughtfully
Before you start, make sure to gather everything you need.
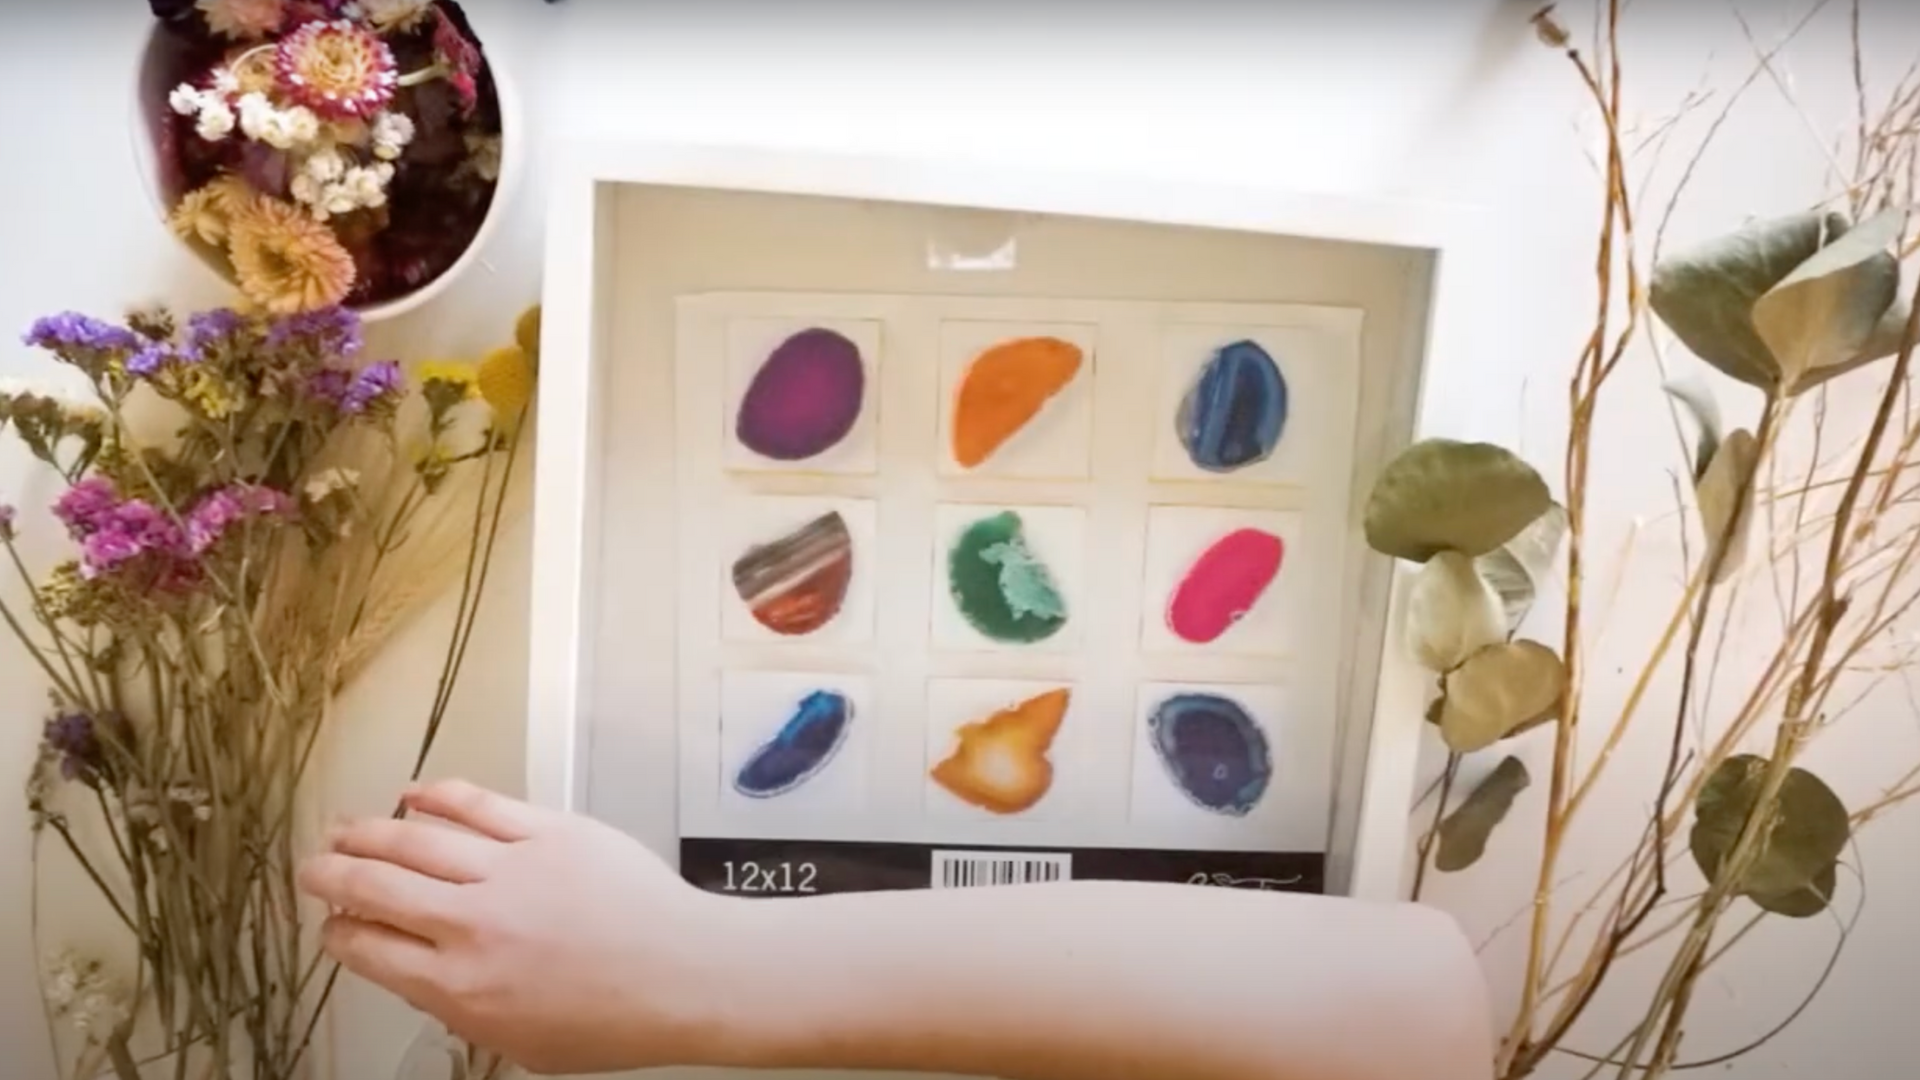
Choose a deep shadow box – 12×12 is a great size to start with – and lay out a variety of dried flowers like zinnias, strawflowers, and eucalyptus. Don’t worry about using everything; having more gives you creative flexibility.
| Tools/Materials | Purpose |
|---|---|
| Shadow Box (12×12 or smaller) | Main frame for your artwork |
| Hot Glue Gun & Glue Sticks | Secures all dried materials in place |
| Scissors or Floral Shears | For trimming branches and stems |
| Dried Flowers (Zinnias, Strawflowers, etc.) | Main decorative elements |
| Fillers (eucalyptus, barley, immobium, etc.) | Adds depth and texture |
| Persian Crest Branches | Base layer for structure |
| Drumstick Flowers & Wild Grasses | Adds charm and movement to design |
| Neutral Fabric-Backed Board (comes with shadow box) | Background base |
A little preparation now makes the entire process much smoother.
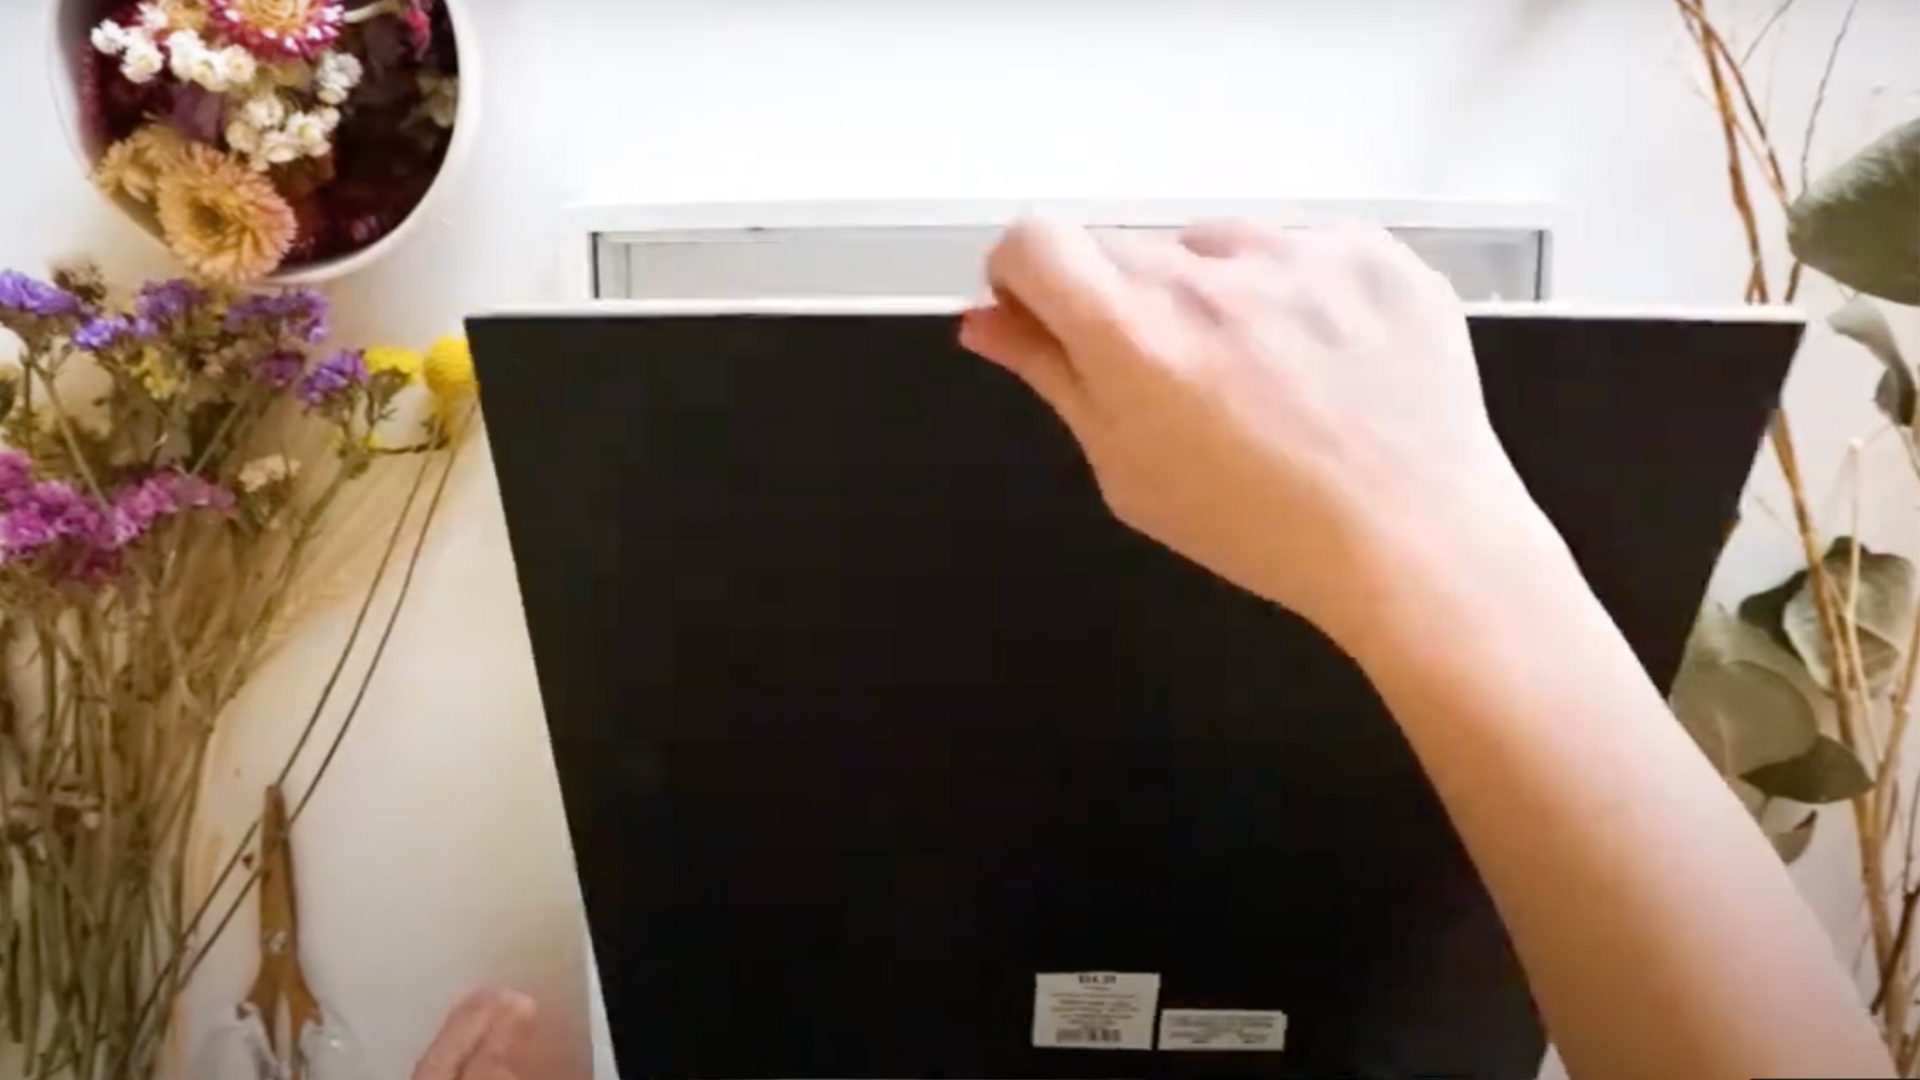
Step 2: Prepare the Shadow Box Backing
To get your board ready for designing:
- Gently remove the back of your shadow box just like you would with a picture frame.
- Set the front portion (glass and frame) aside in a safe spot.
- Observe the backing; it usually has a soft fabric covering with some padding underneath.
- This plush base adds warmth and provides a slightly textured surface for your glue to grip onto.
- Choose a neutral fabric-backed board; it helps your dried flowers pop without stealing the spotlight.
- Avoid dark or glossy surfaces, which can overpower your arrangement.
- Keep the board clean and free of dust or debris before starting.
This base will support the beauty you’re about to build, so set it up with care.
Step 3: Trim and Test Your Layout
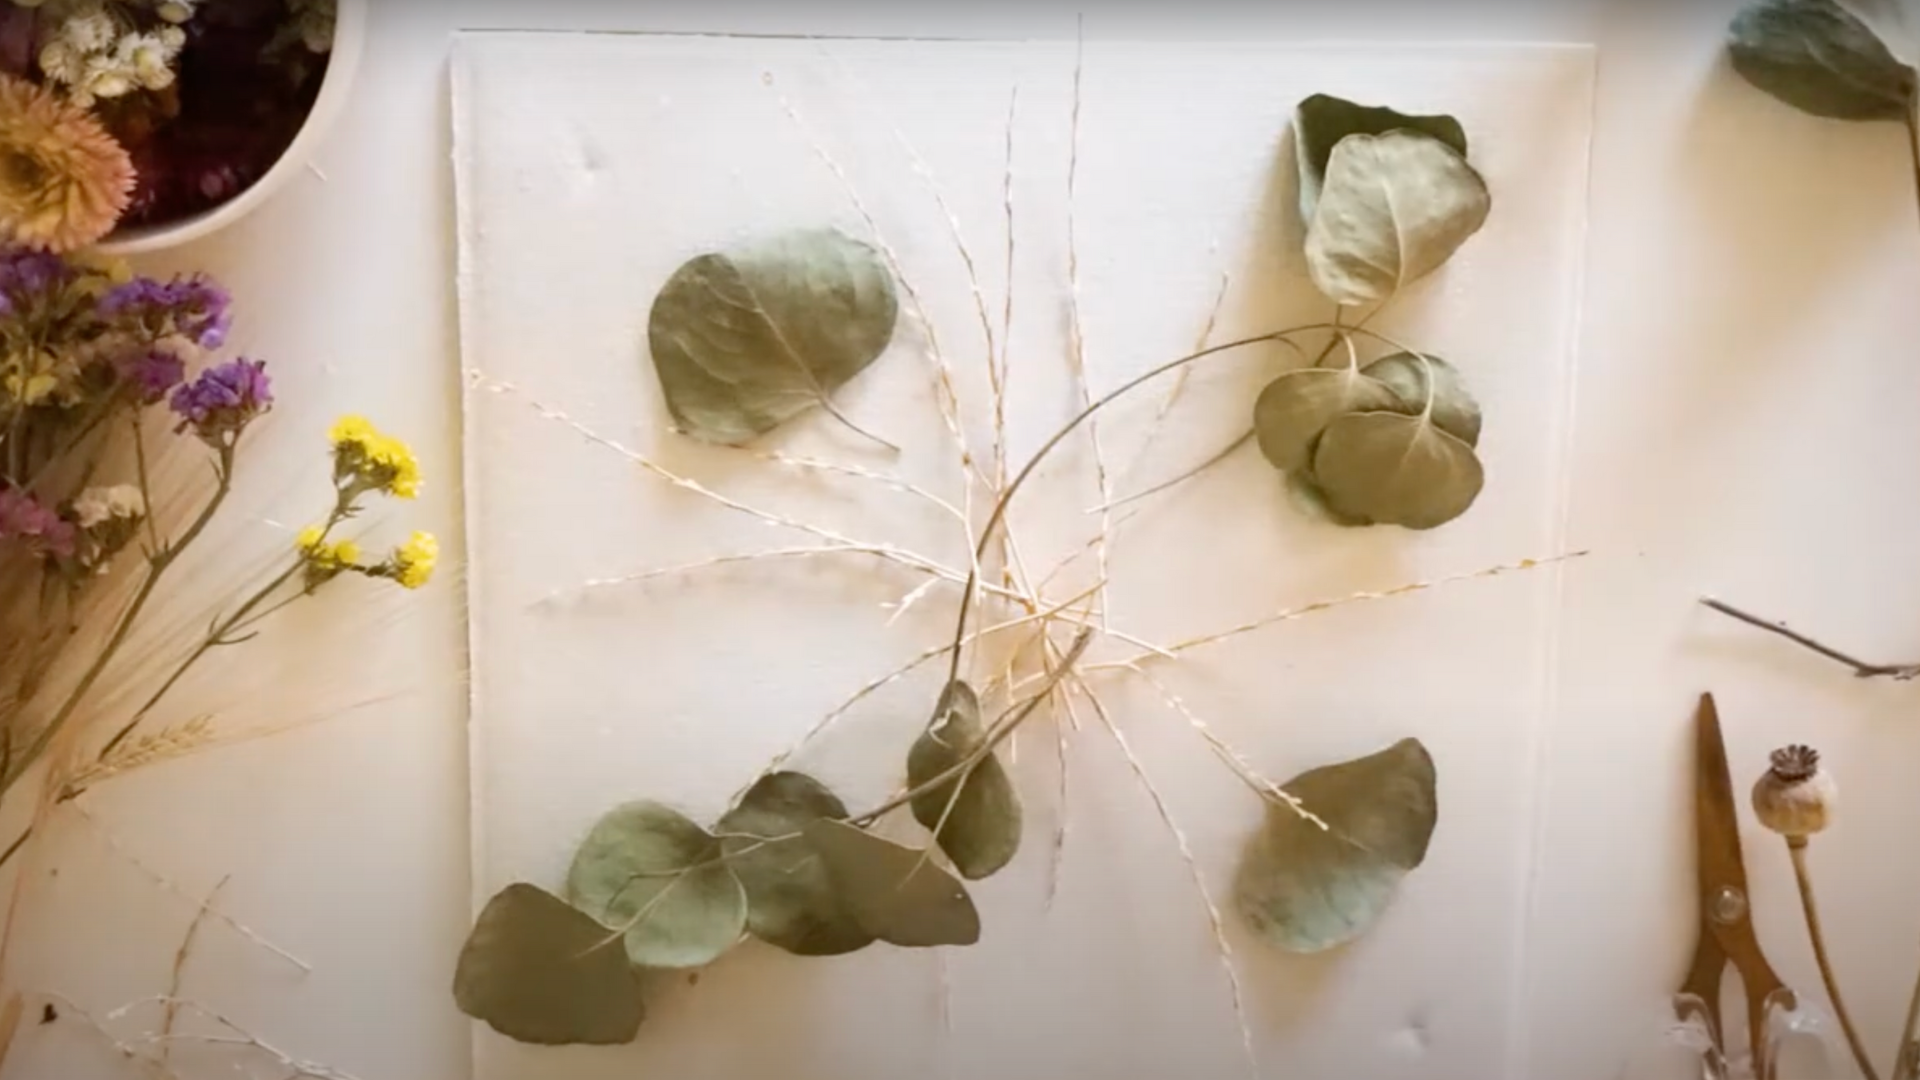
Before gluing, take time to trim and position your pieces. Start by breaking down bulkier stems like Persian Crest, which often curve or stick out awkwardly.
This helps you:
- Avoid bulk that presses against the glass.
- Use more of the stem while keeping a clean profile.
- Maintain visual balance without dominant branches.
Once trimmed, loosely arrange your elements:
- Begin with your base materials like crest branches.
- Form a rough circle or “bouquet-from-above” shape, mimicking a firework.
- Lay eucalyptus or long pieces at angles to add depth.
This dry layout gives you flexibility. Adjust freely until you’re happy, gluing comes next!
Step 4: Start Gluing the Base Layer
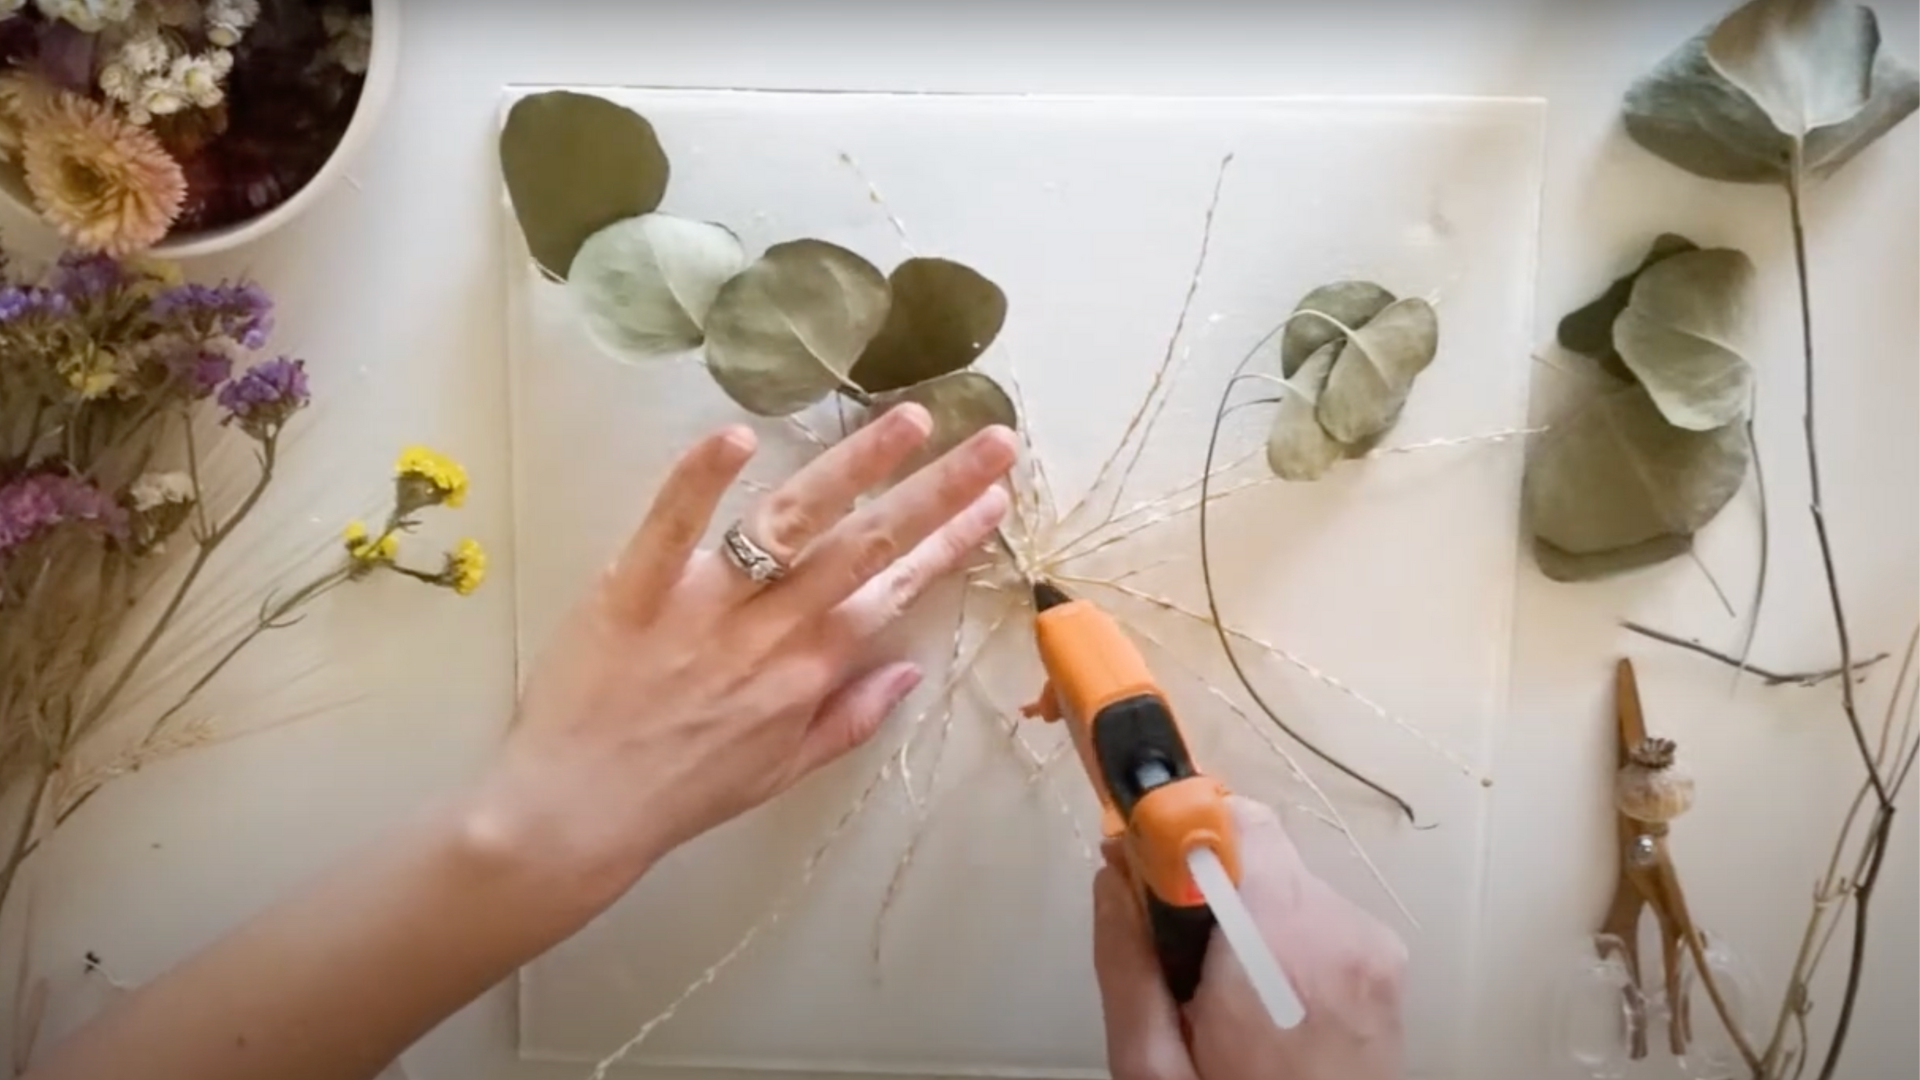
Once your layout feels just right, it’s time to secure the base layer. Apply a generous but controlled blob of hot glue in the center of your fabric board – this is where your foundational stems will go.
Be mindful of working steadily, as hot glue cools quickly.
Hold each branch or stem down for a few seconds until it’s fully set. If pieces lift up, add a dab of glue further out and press again. Patience pays off here.
A secure base means everything else will layer beautifully on top without slipping or bulging.
Step 5: Build Texture with Fillers and Focal Flowers
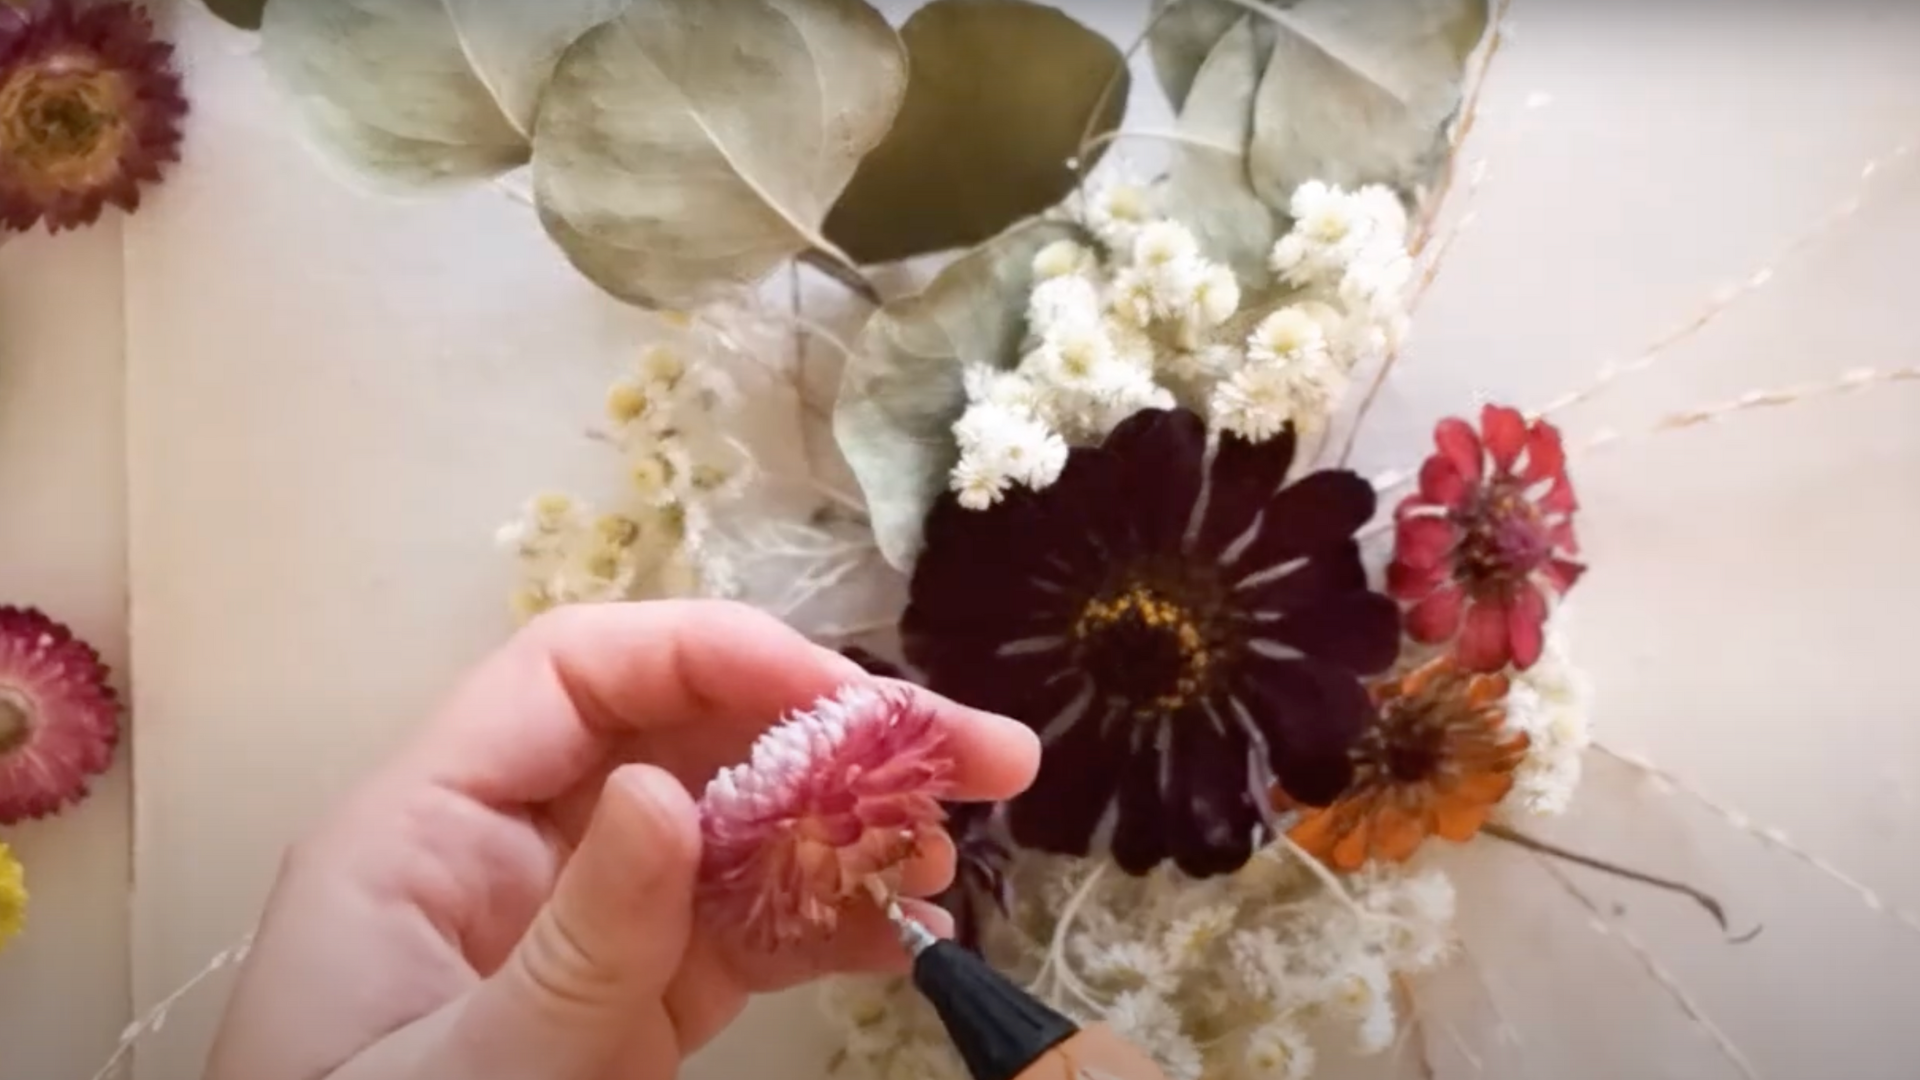
Now it’s time to bring life and dimension to your design. Start with the filler flowers first; they form a cozy nest for your main blooms.
Add the following:
- Eucalyptus – lays flat, adds graceful structure
- Immobium or tiny wildflowers – softens gaps and boosts visual interest
- Barley – lends rustic charm and fine detail
Next, position your focal flowers:
- Place zinnias or larger blooms atop the filler base.
- Use medium-sized strawflowers to fill in gaps and create balance.
- Vary colors and sizes to add richness and keep the eye moving.
Layer with love and don’t overthink; it’s your art!
Step 6: Add Whimsy and Final Touches
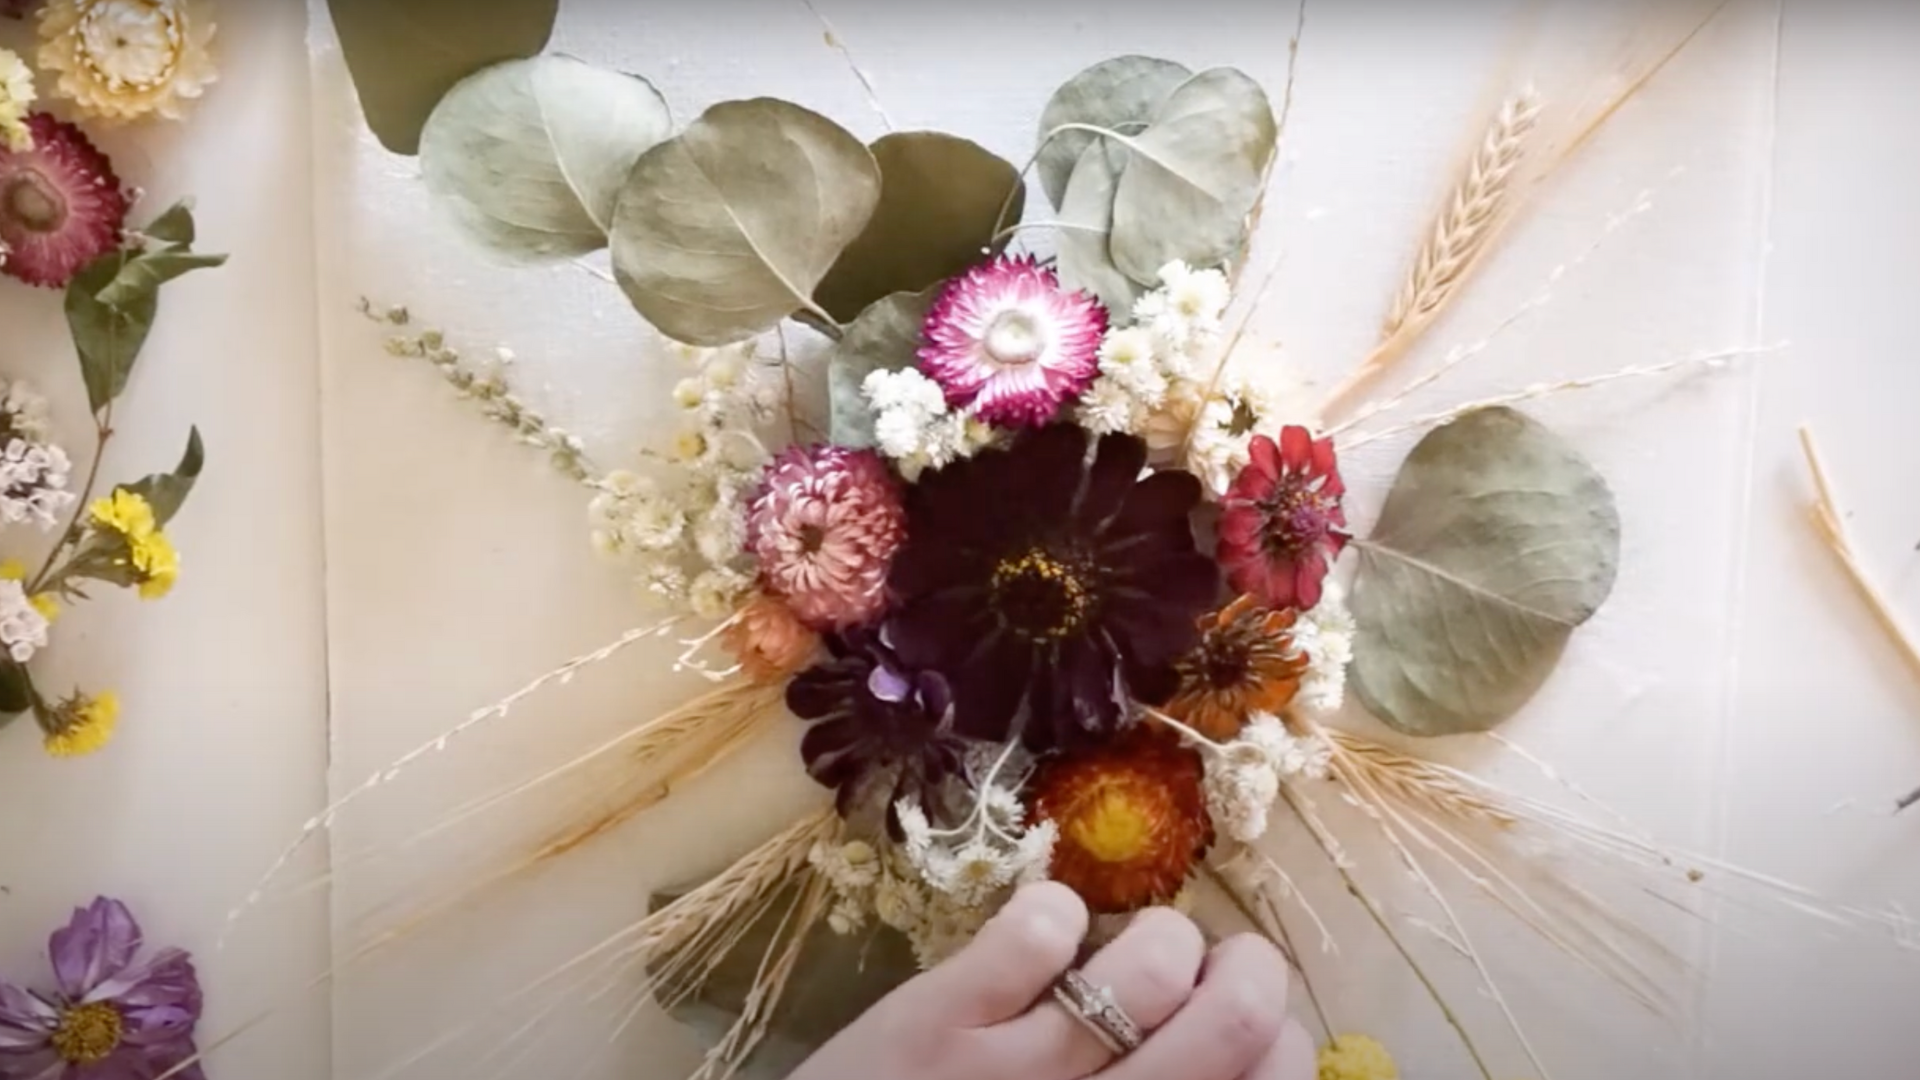
With the core design in place, it’s time for those little extras that add magic:
- Use drumstick flowers to balance heavy areas, especially near corners.
- Tuck in foraged grass or airy stems for a soft, whimsical vibe.
- Add more barley around the frame to unify the look.
- Snip any overhanging or wild bits to refine edges.
- Step back often and assess for symmetry and flow.
- If needed, test placement before gluing final pieces.
- Be light-handed; less is often more when using unique florals.
These finishing touches bring your shadow box from pretty to polished.
Step 7: Finish and Frame It
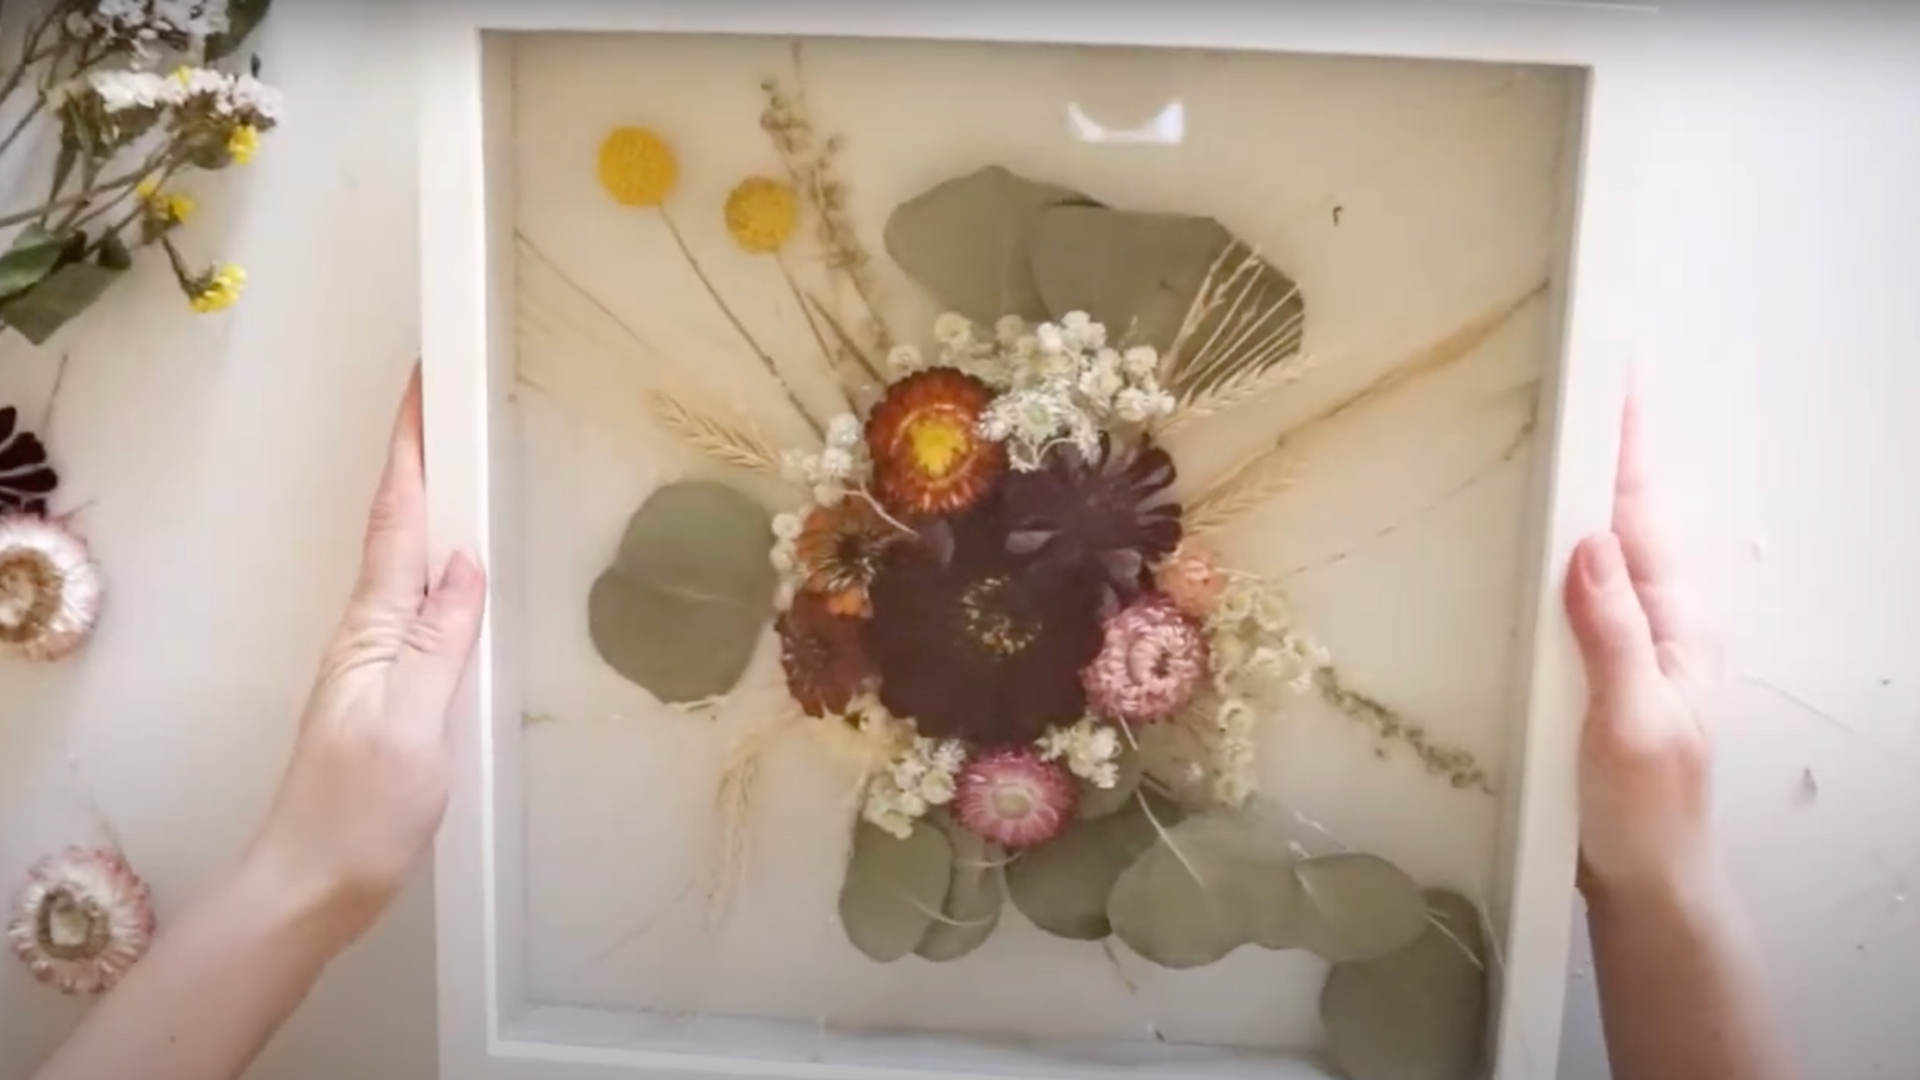
Once everything looks just right, it’s time to complete your masterpiece. Carefully snip any poking-out stems or itchy bits like barley fibers from the edges. Also double-check for glue strands as they’re easy to miss but noticeable when framed.
Place the board back into the shadow box. Only press down two metal tabs first so you can still make minor tweaks. Once satisfied, secure the rest of the tabs.
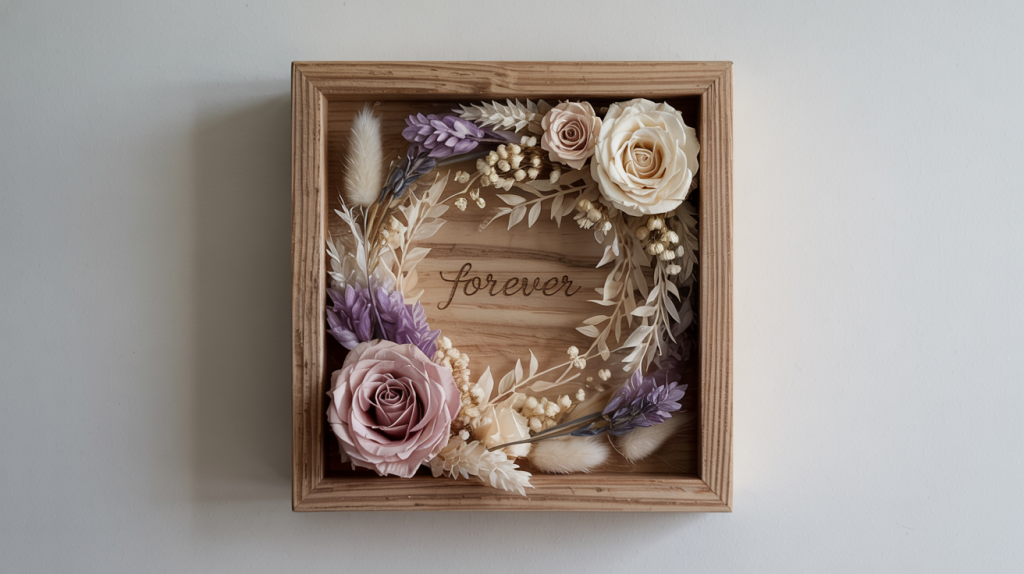
Your shadow box for dried flowers is now ready to hang or gift. Take a proud step back; this handcrafted beauty deserves a spotlight!
For a more detailed tutorial on how to create a shadow box for dried flowers, check out the video below:
Essential Tips for Designing a Shadow Box with Dried Flowers
Creating a stunning shadow box for dried flowers requires some planning to achieve the best results.
Tip 1. Choose the right box depth: Select a frame that’s deep enough to accommodate your flowers without crushing them, typically 1-2 inches deep for most arrangements.
Tip 2. Create a focal point: Position your largest or most colorful dried flower slightly off-center to draw the eye and build the rest of your design around it.
Tip 3. Layer your elements: Place taller items toward the back and shorter ones in front to create depth and interest in your display.
Tip 4. Consider color harmony: Use flowers in complementary or monochromatic color schemes for a more pulled-together look that will enhance your home décor.
Tip 5. Secure everything properly: Use tiny dots of craft glue or thin wire to attach flowers to the backing board so they won’t shift over time inside your shadow box.
When you follow these simple guidelines, your shadow box for dried flowers will become a beautiful piece of natural art that preserves special memories.
Wrapping It Up
Making a shadow box for dried flowers combines crafting with memory-keeping. I hope this guide has shown you how simple it can be to preserve your special blooms.
Remember to select flowers that dry well, use the right depth box, and create a balanced design. These small details make a big difference in your final display.
Your dried flower art isn’t just decoration, it’s a way to hold onto meaningful moments. Each time you look at your creation, you’ll remember the event those flowers came from.
Have you made a shadow box before? What flowers did you use? Share your experiences in the comments below!
Frequently Asked Questions
How Long Will Dried Flowers Last in a Shadow Box?
Properly dried flowers in a shadow box can last 1-3 years. Keep them away from direct sunlight and humidity to prevent fading and extend their life.
What Is the Best Glue for Dried Flowers in a Shadow Box?
Acid-free craft glue or hot glue works best. Apply tiny dots to minimize damage. Clear-drying glue is ideal. Avoid regular white glue as it can show through petals.
How to Display a Dried Flower Bouquet?
Hang upside down to dry first. Then place in a shadow box, arrange in a vase, or create a wall hanging. Keep away from moisture and direct sun for longer-lasting displays.