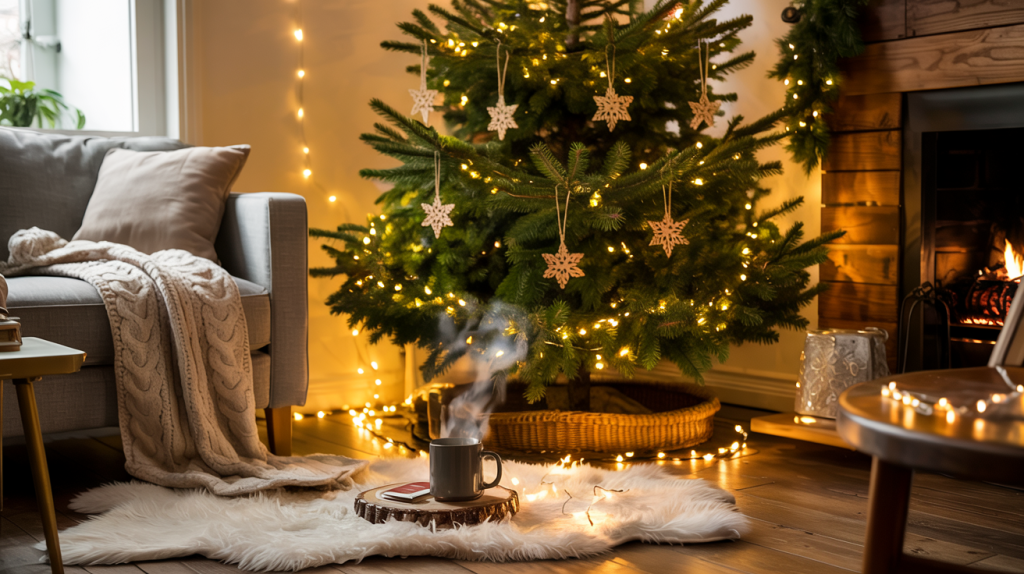
Do you notice how wooden snowflake ornaments catch your eye every holiday season? They hang from trees and mantels in homes across the country.
Many people struggle to find decorations that feel both special and natural during the winter months.
Wooden snowflake ornaments offer a simple answer to this common problem. They bring warmth and character to any space without looking mass-produced or fake.
In this post, I’ll show you how to select, place, and care for wooden snowflake ornaments. You’ll learn tips to make your holiday setup stand out in ways plastic or glass decorations simply can’t match.
Why Choose a Wooden Snowflake Ornament This Holiday Season?
Wooden snowflake ornaments stand out for good reasons this holiday season. They last longer than paper ones and cost less than glass options. The natural wood feel adds warmth to cold winter days that plastic decorations just can’t match.
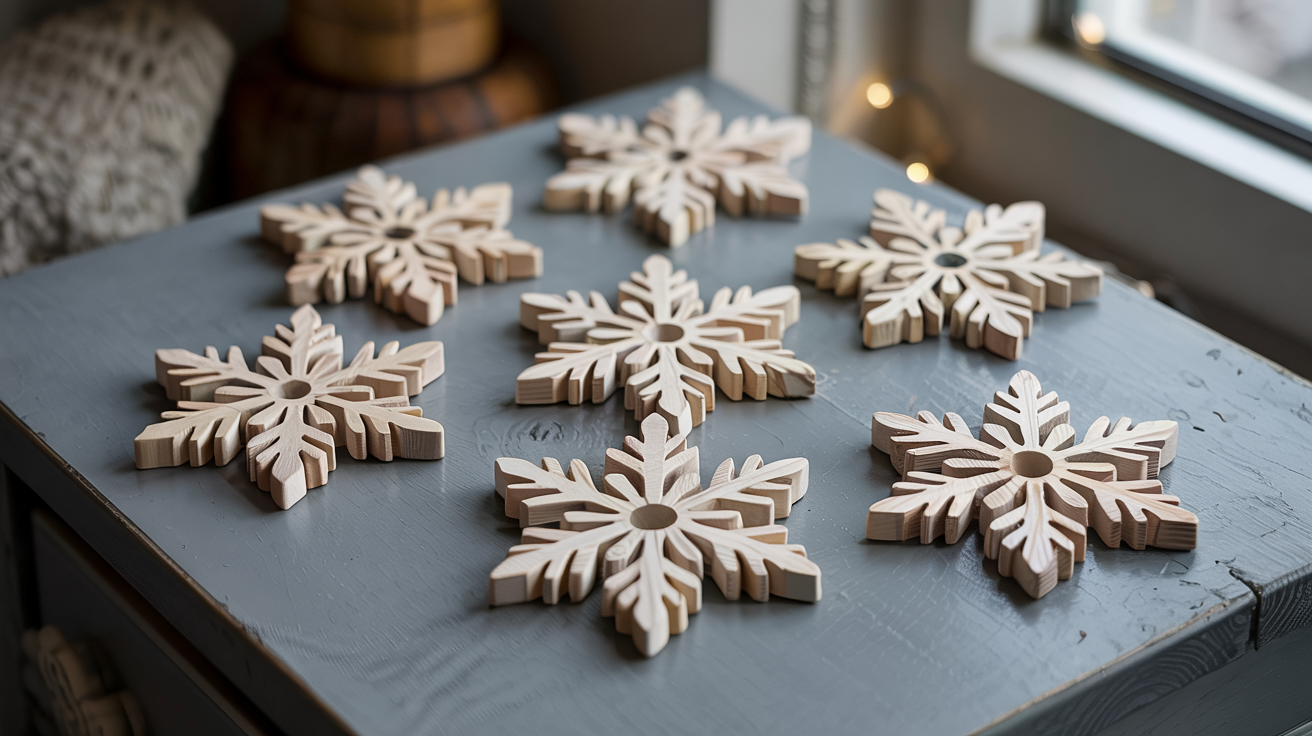
Each wooden snowflake has its own little marks and grain patterns; no two look exactly alike. They work with any style of home decor, from modern to rustic.
I like to use them year after year. They won’t break easily if kids or pets bump the tree. Wood also takes paint well if you want to change its look next season.
For folks who care about the earth, wood is a better choice than plastic; it breaks down naturally when its time is done.
Best Ways of Decorating Your House Using Wooden Snowflake Ornaments
Finding fresh ways to use wooden snowflakes can change your holiday home.
Let’s look at some smart methods to display these winter gems throughout your living space.
1. Window Displays
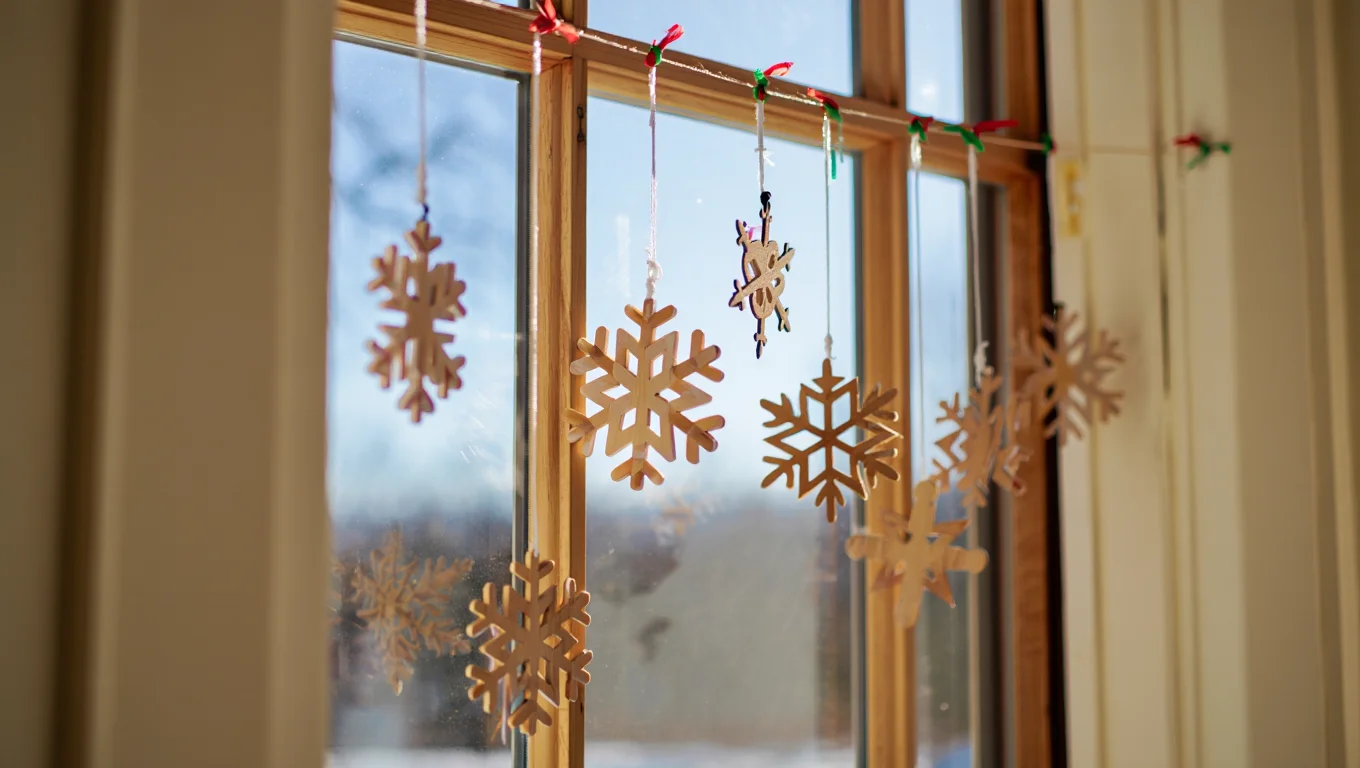
Hanging wooden snowflakes at different heights in windows creates a magical effect when light shines through. This setup looks great from both inside and outside your home.
- Price Range: $15-$30 for a complete window setup
- Durability Factors: Choose sealed wood that won’t warp with temperature changes near windows
- How to Put It: Use clear fishing line or thin white thread to hang at varying heights; attach to the top window frame with small removable hooks
- My Top Recommendation: 30 Pcs Wooden Snowflakes Ornaments
2. Mantel Arrangements
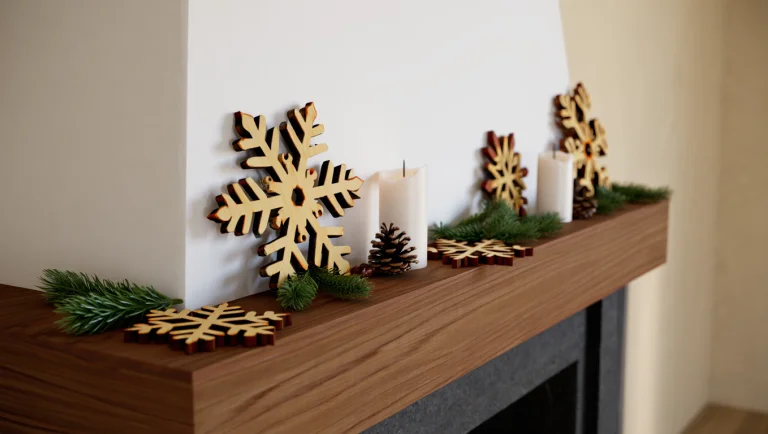
Your fireplace mantel offers the perfect stage for wooden snowflakes. Mix them with greenery and candles for a cozy winter scene.
- Price Range: $25-$50 for a full mantel display including greenery
- Durability Factors: Keep away from direct heat if the fireplace is used often
- How to Put It: Lay flat or prop against the wall; use museum putty on the bottom to prevent sliding
- My Top Recommendation: 30 Pack Metal Rusted Snowflake Decorations
3. Table Centerpieces
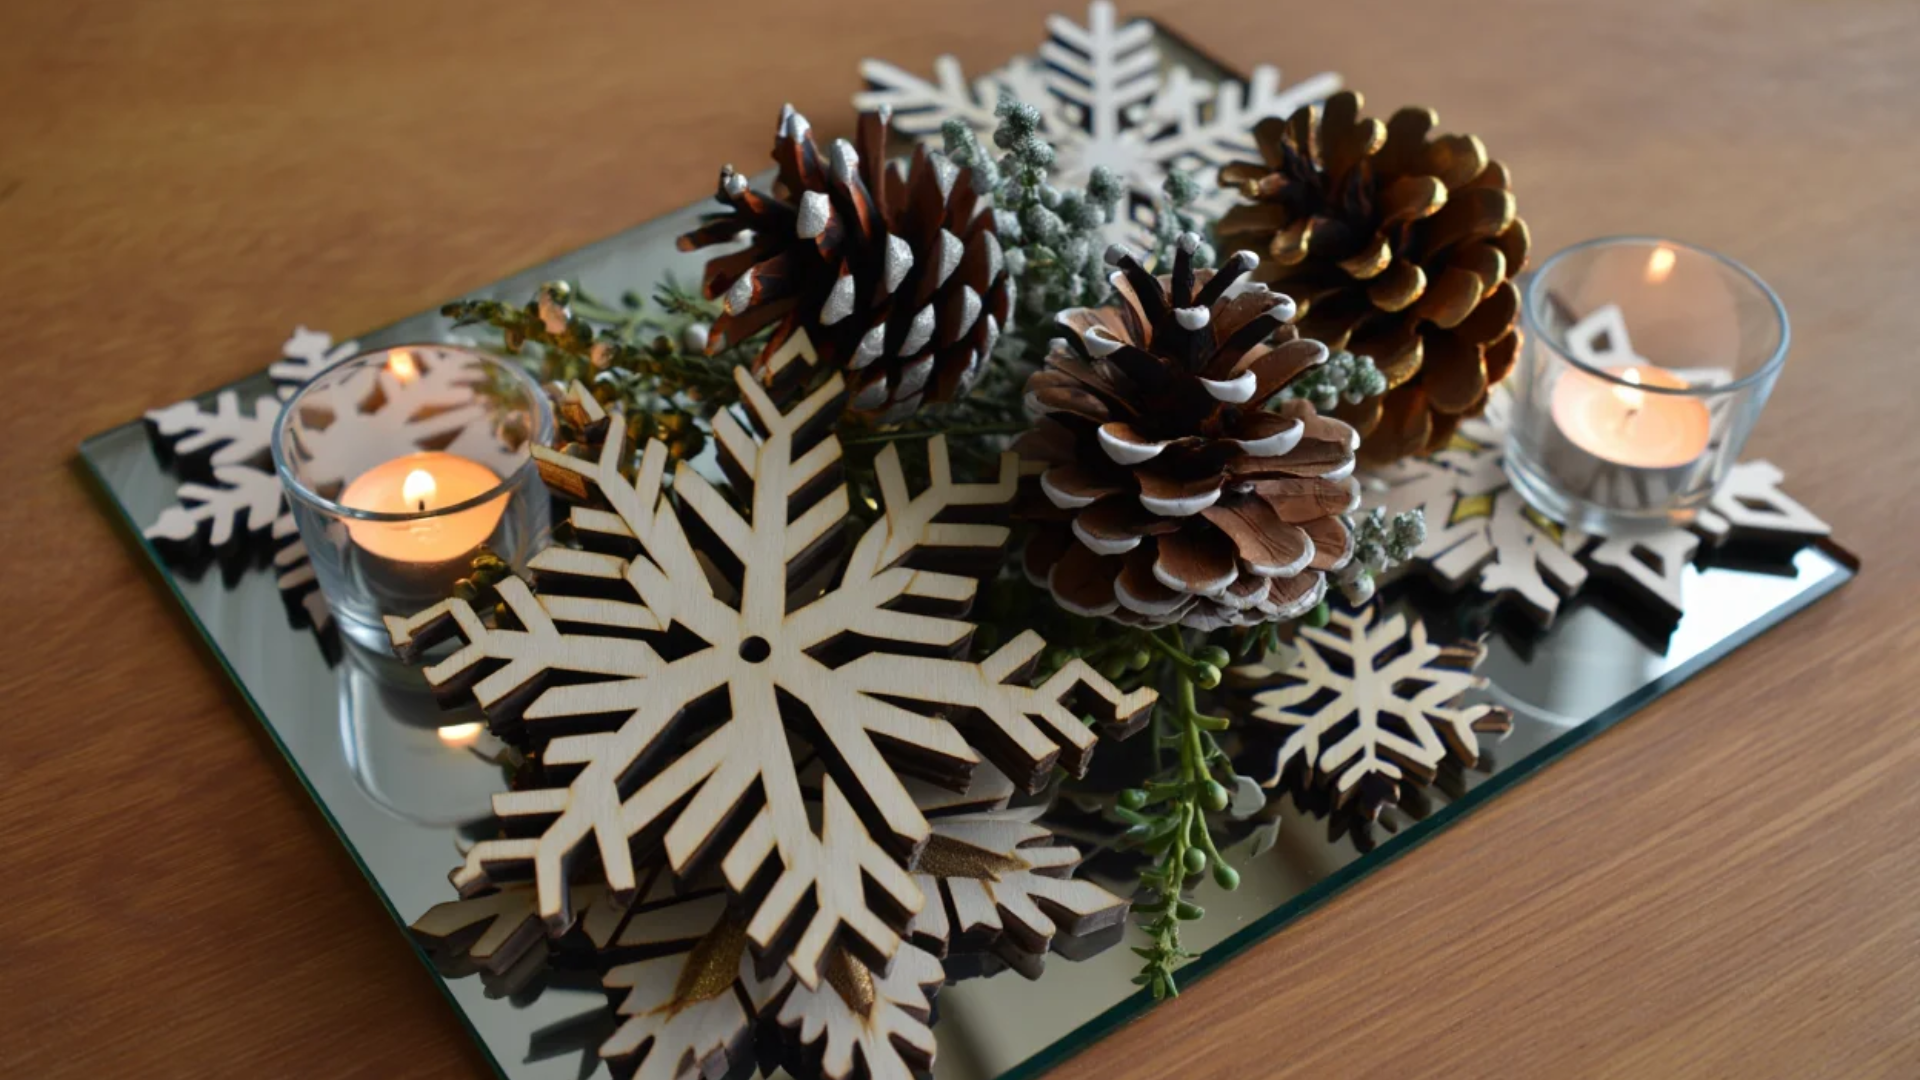
A cluster of wooden snowflakes makes a stunning centerpiece for holiday meals and gatherings.
- Price Range: $20-$35 for a table centerpiece setup
- Durability Factors: Apply a food-safe finish if snowflakes will be near food
- How to Put It: Place flat on a mirror tile or scatter among pinecones and tea lights
4. Staircase Garland
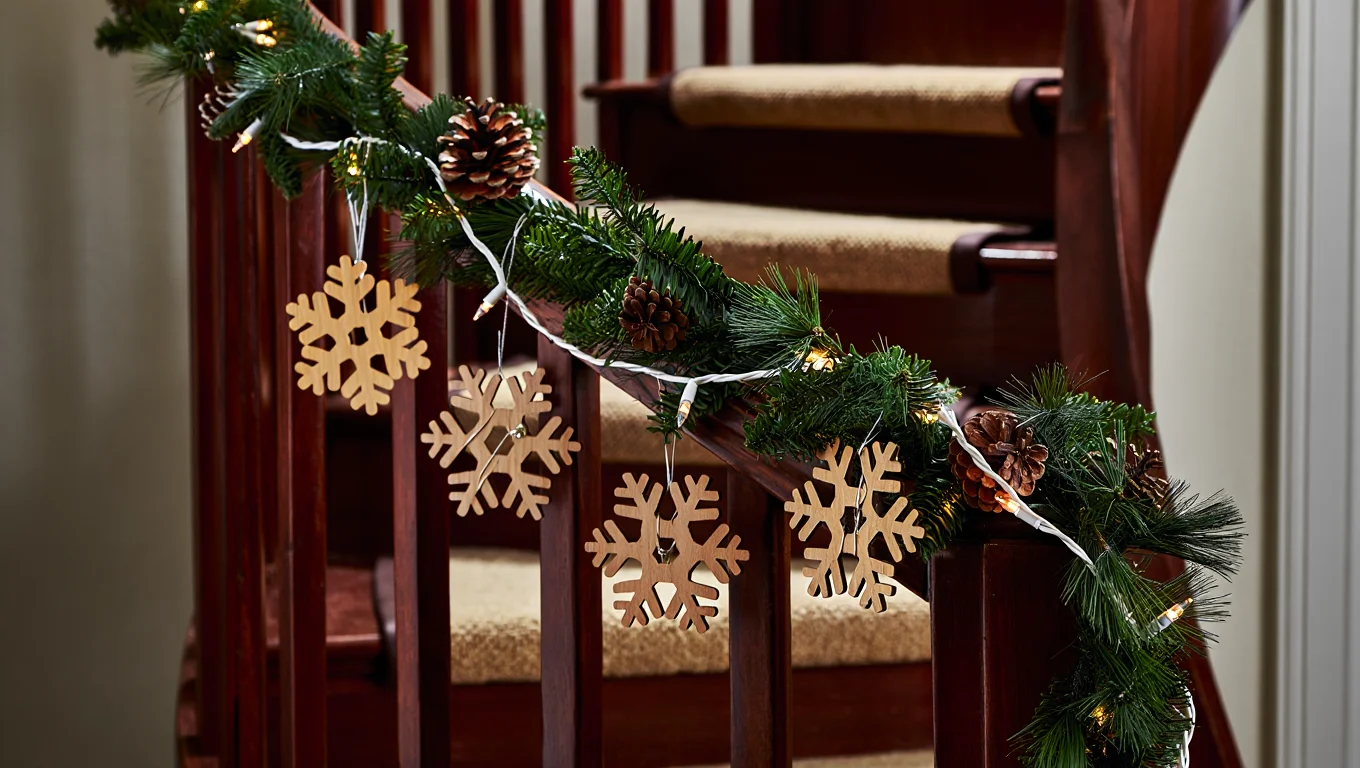
Alter your staircase by adding wooden snowflakes to a garland wrapped around the banister.
- Price Range: $30-$60, depending on staircase length
- Durability Factors: Secure well to prevent falls if brushed against
- How to Put It: Attach to garland with floral wire or small clips every 12-18 inches
- My Top Recommendation: 12 Pcs Wooden Snowflakes Ornaments
5. Wall Gallery
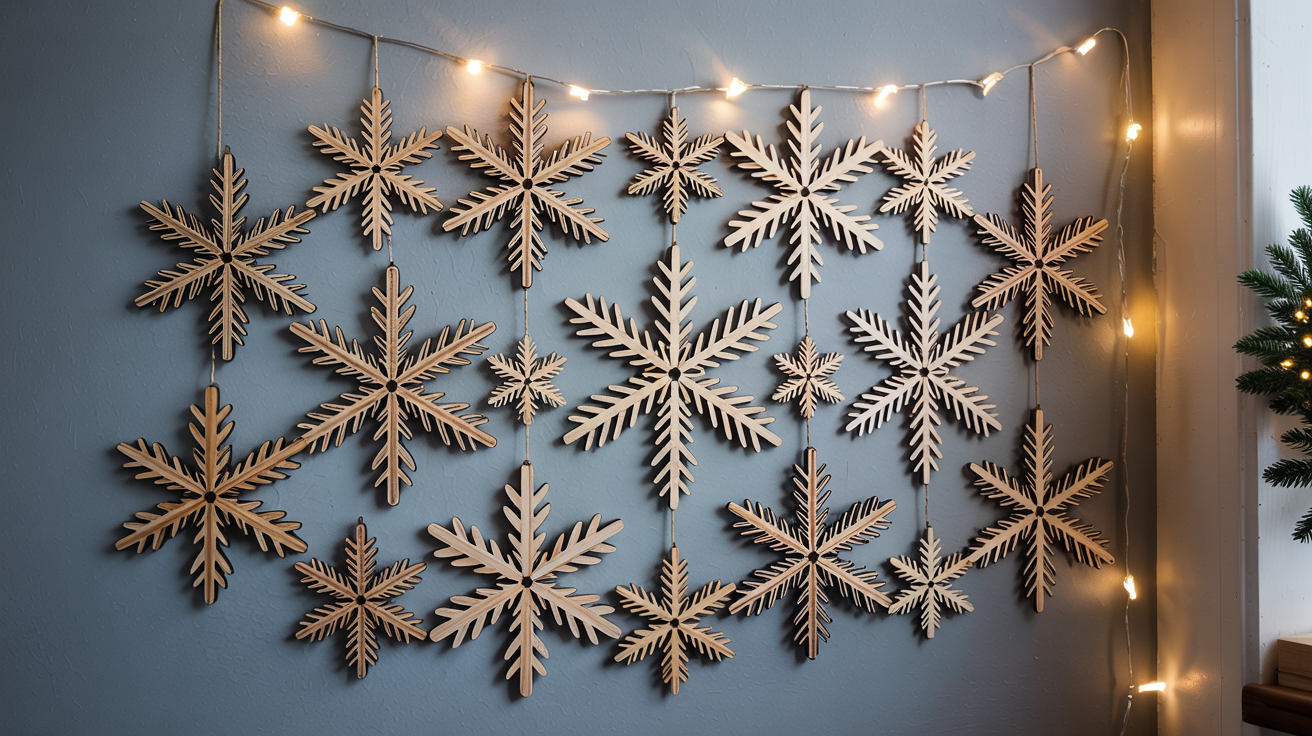
Create a wall gallery of different-sized wooden snowflakes for a focal point in any room.
- Price Range: $40-$75 for a complete wall display
- Durability Factors: Once hung, these will last many seasons with minimal care
- How to Put It: Use removable picture hanging strips or small nails; arrange in a circular or cascading pattern.
- My Top Recommendation: 12 Large Wooden Christmas Snowflake Cutouts
6. Front Door Wreath
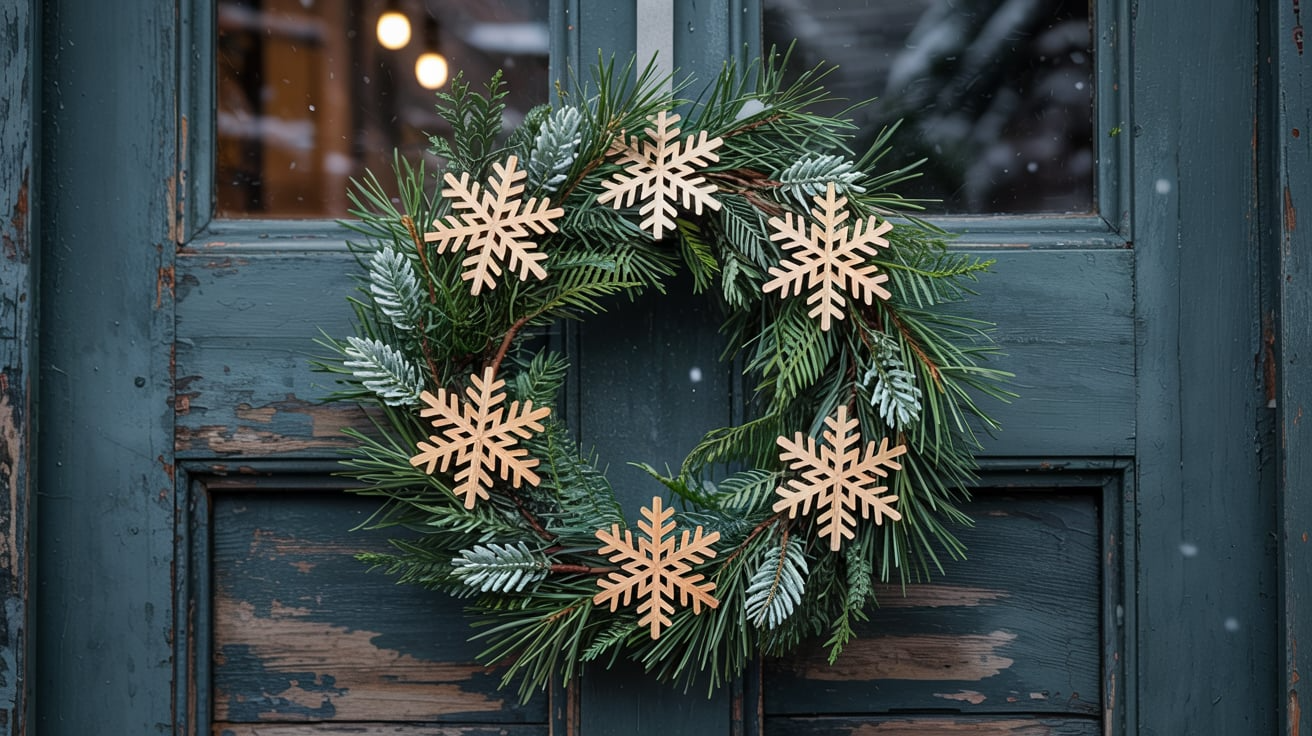
Add wooden snowflakes to a simple wreath for a touch of winter charm at your entrance.
- Price Range: $25-$45 for a decorated wreath
- Durability Factors: Choose weather-treated snowflakes for outdoor use
- How to Put It: Attach with hot glue or wire to a base wreath of pine or grapevine
- My Top Recommendation: T-Antrix 50pcs DIY Wooden Snowflakes
7. Gift Toppers

Small wooden snowflakes make your wrapped presents look extra special.
- Price Range: $10-$20 for a set of gift toppers
- Durability Factors: These can be saved and reused by gift recipients
- How to Put It: Attach with ribbon when wrapping gifts; write names on them for gift tags
Steps to DIY Wooden Snowflake Ornaments for Kids

Step 1: Gather Your Supplies
You’ll need-
- Thin wooden craft sticks (popsicle sticks work great!)
- White or colored paint
- Glue (wood glue preferred, school glue as backup)
- String for hanging
- Extras like glitter or small beads
- Newspapers to protect your table surface
This project works best with regular wood glue, though school glue can work in a pinch if that’s all you have.
Step 2: Create the Snowflake Shape
Place three sticks that cross at the center, forming a star shape. Make sure the spaces between sticks are about equal. Put a drop of glue where all the sticks meet in the middle.
Hold them together for 30 seconds, then let them dry for 10 minutes. This forms the base of your snowflake. Kids might need help holding the sticks in place until the glue sets enough.
Step 3: Add Details to Your Snowflake
Cut smaller pieces from extra sticks. Glue these between the longer sticks to make patterns. You can make V-shapes, straight lines, or any design you like. There’s no wrong way to make a snowflake!
Let all glue dry fully before moving to the next step. Younger kids do better with simpler patterns using fewer pieces.
Step 4: Paint Your Snowflake
Paint your snowflake white, or try other colors for a fun twist. Let kids pick their favorites!
Use a small brush for better control. Paint one side first, let it dry, then flip and paint the other side. Add dots of glue and sprinkle with glitter if you want extra sparkle. Let dry completely on wax paper.
Step 5: Add a Hanging Loop
Cut a 6-inch piece of string or ribbon. Fold it to make a loop.
Glue the ends to the back of your snowflake. Let dry for an hour before hanging. Now you can put your wooden snowflake on the tree, in a window, or give it as a gift! These can last for years if stored carefully.
Safety Disclaimer: Adult help is needed for this project, especially when cutting wooden sticks or using hot glue guns. Keep scissors, glue, and craft supplies out of reach when not in active use, and make sure hands are washed after crafting.
The Bottom Line
So, what’s the magic of wooden snowflake ornaments?
They bring natural beauty to holiday decor while offering lasting value year after year. Whether you bought the perfect set from our recommendations or made your own with the kids, these timeless pieces add character to any home.
In a world of throwaway decorations, wooden snowflakes stand as a small but meaningful step toward more thoughtful holiday traditions.
Try hanging a few wooden snowflakes in your window this week. Or set aside an afternoon for crafting with your family. The simple joy these decorations bring might surprise you.
Got your own wooden snowflake ideas? Share them in the comments below or tag us in your holiday decor photos!